OpenVPN between pfSense and Mikrotik
Reading time: 3 – 5 minutes
 Assuming previous scenario I’m going to describe the required configurations on pfSense and Mikrotik. Certifcate creation is not part of the scope of this document, if you are not familiar about how to do that it’s a good idea to use the pfSense certificate manager to do it. My last advice is take care with certificates 90% of problems that I found in my life when I was working on VPNs are because of that. Take your time to check it before spend your time playing with other configurations.
In that scenario pfSense will play the role of the VPN server and Mikrotik will be the client, so I’m going to start describing pfSense configurations.
Create OpenVPN server on proper section:
Important things to take in account when you set up the parameters are socket has to be a TCP socket in my case I decided to use port 1201:
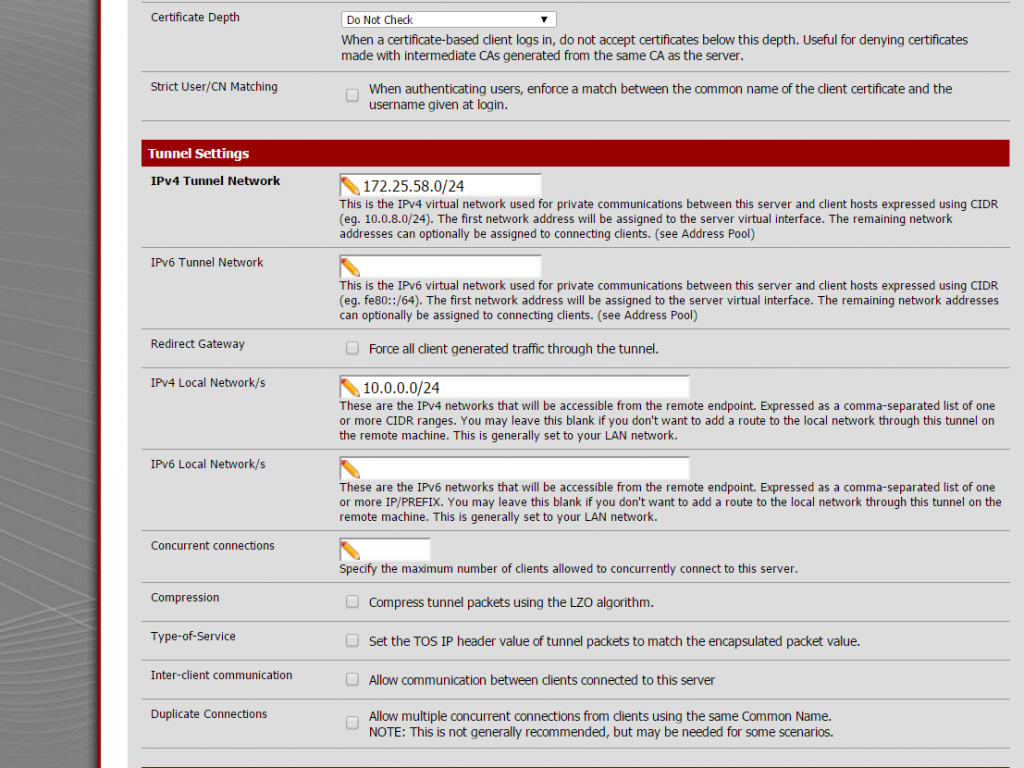
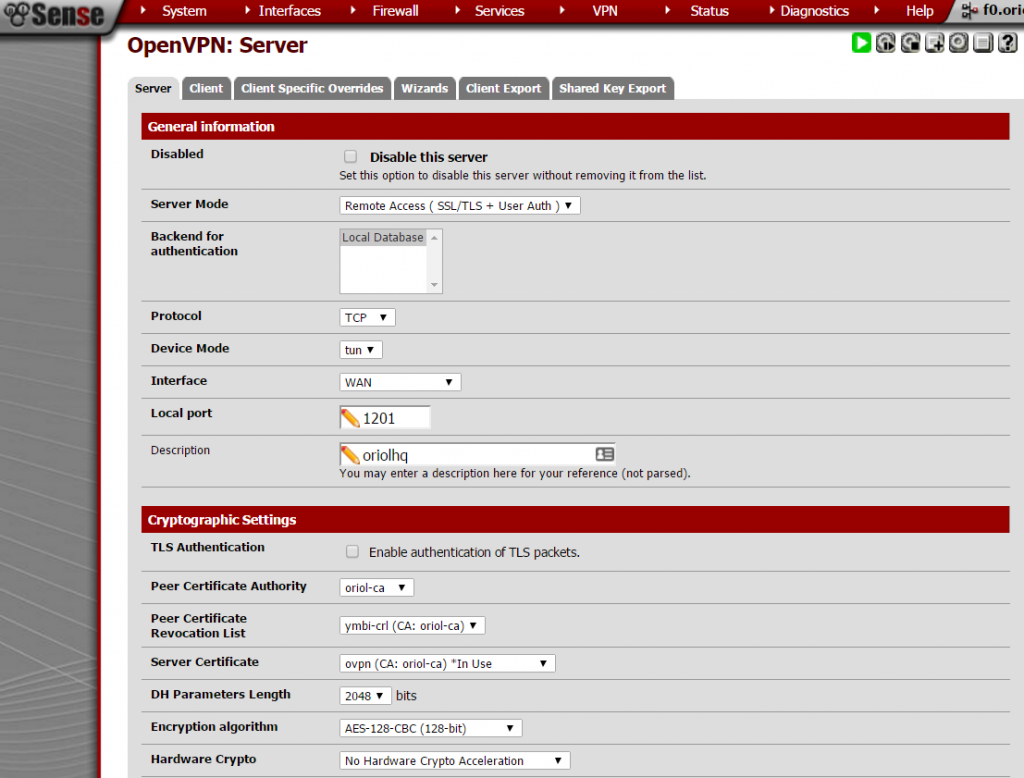 Next settings on the same place are about local network and tunnel IP addresses, this is required to create proper routing rules on the server and the client.
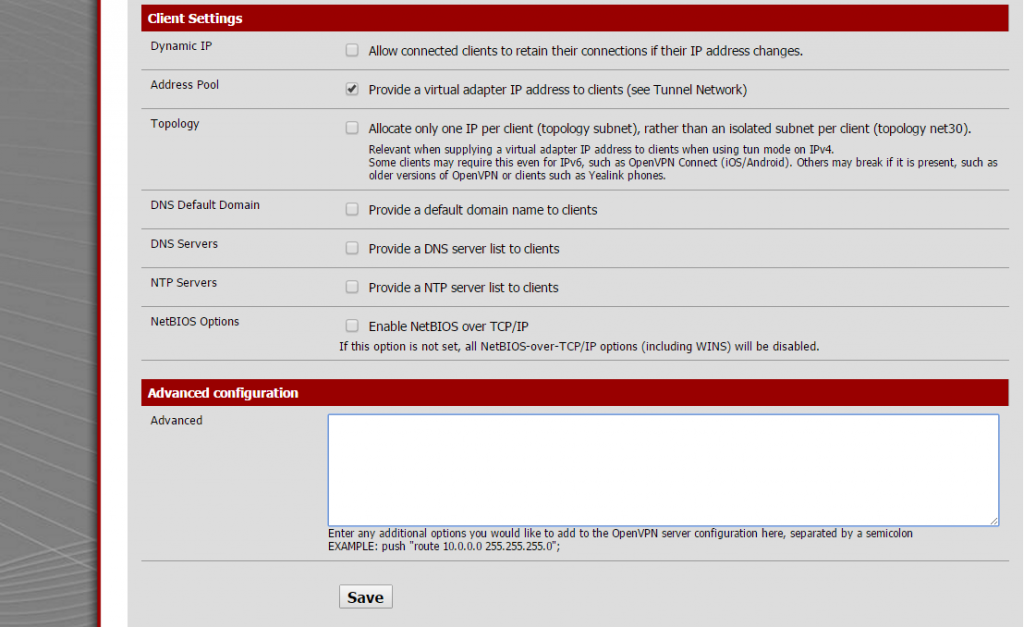
Last part to configure on this sections is extremly simple, only take care to unmark everything and check “address pool” setting.
Remember to open that port on Firewall rules.
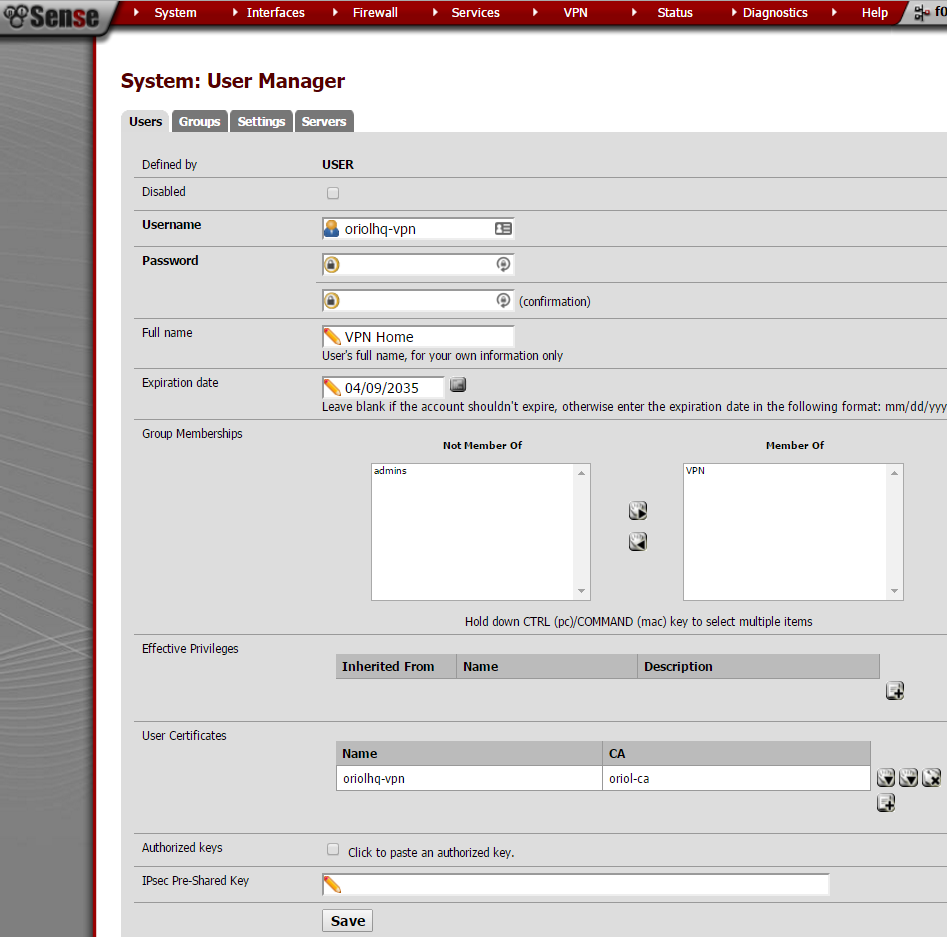
A VPN user is required to authenticate the process, just go to “User Management” inside the “System” menu:
pfSense is configured, now it’s time to set-up the OpenVPN client on Mikrotik using Winbox. Remember to import the certificates:
Click on “PPP” this on the left menu:
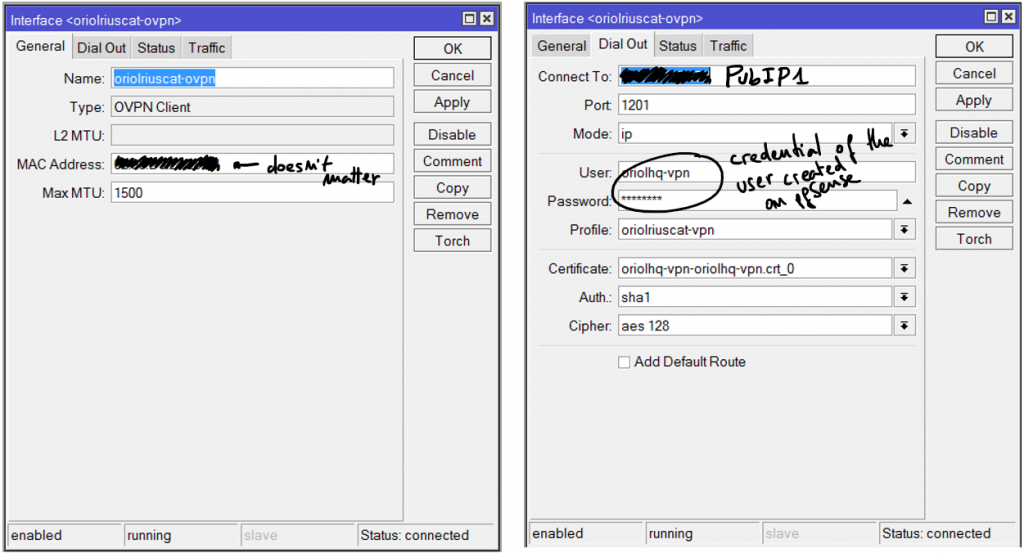
Add an OVPN Client connection using the “+” button, the parameters for that connection are:
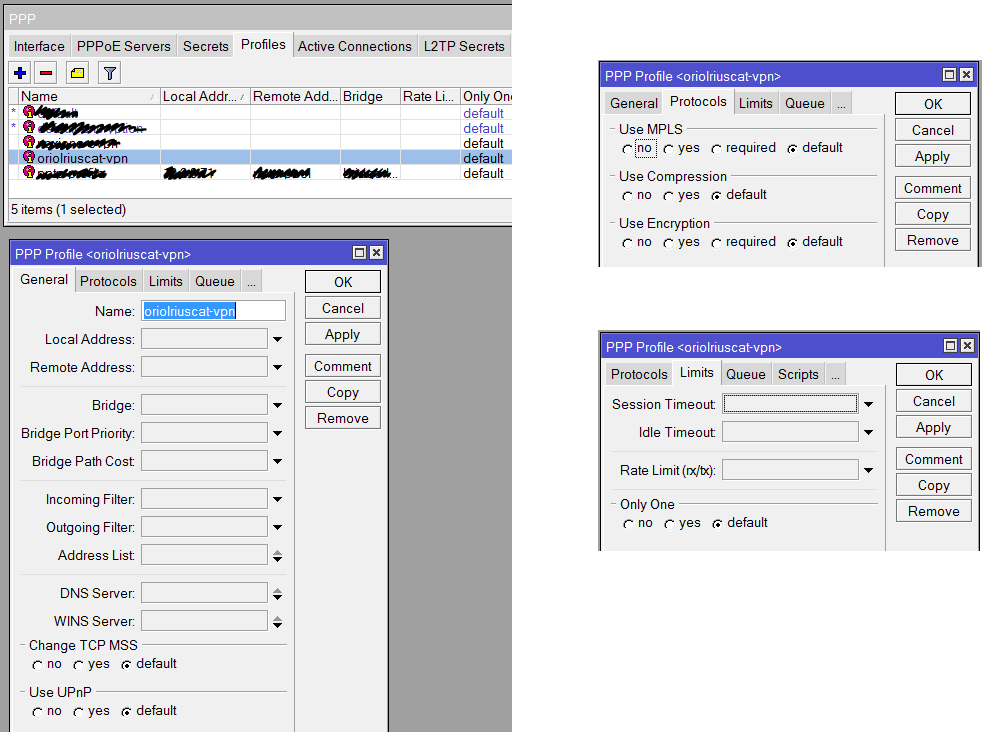
Another required thing to define on “PPP” is the profile, click on the tab “Profile” and using the button with symbol “+” create a new profile like that:
Everything is ready, now it’s time to check if the connection is OK. First go to the OVPN client on Mikrotik, remember this is on “PPP” menu option and inside tab “Interfaces”. Clicking on the interface you’ll see the status details. If it’s disconnect going to pfSense or Mikrotik logs you can see the negotiation details.
Remember usually the problem is with your certificates, but first of all you have to ensure that the negotiation tries to start.
Enjoy it and good luck.

