Reading time: < 1 minute
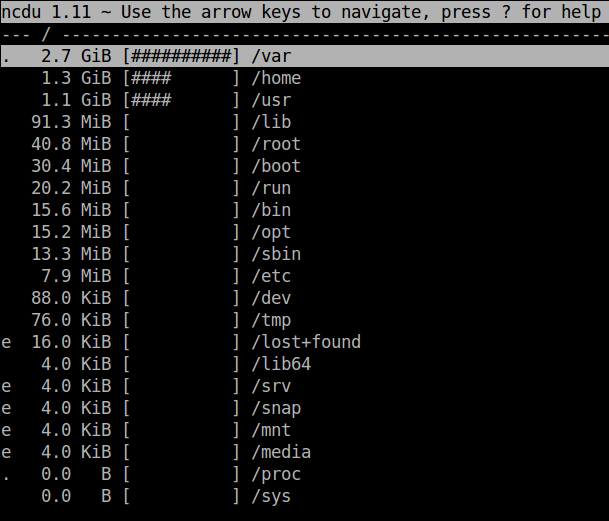
Some time ago I found a ncurses based tool very small easy and useful to get a very fast and easy way to analyze disk usage in linux. This entry is just to remember the name of that tool because I always forget its name.
Ncdu is a disk usage analyzer with an ncurses interface. It is designed to find space hogs on a remote server where you don’t have an entire graphical setup available, but it is a useful tool even on regular desktop systems. Ncdu aims to be fast, simple and easy to use, and should be able to run in any minimal POSIX-like environment with ncurses installed.
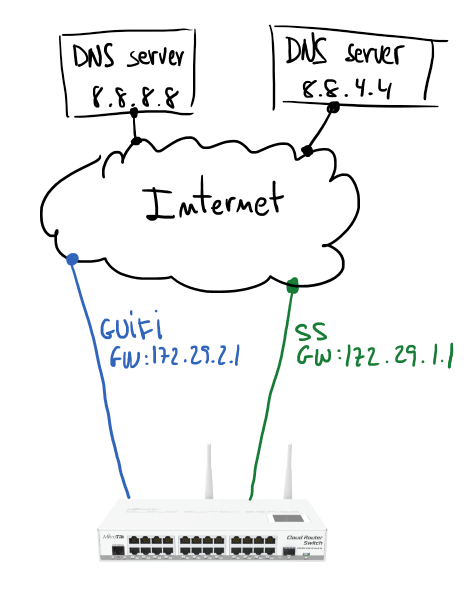
Based on my home configuration I’m going to describe how to set up a Mikrotik to manage fail over Internet connection. Next schema describes a Mikrotik gateway with two internet connections (GUIFI and SS). Assuming GUIFI as a default Internet connection periodic checks on Google DNSes (8.8.8.8 and 8.8.4.4) will allow to know when it’s good to change the default route.
If you have some Linux routing background it will be easier to understand the configuration. Main idea is use policy routing tables and mark packets to use one table or other. In my case I have two routing tables GUIFI and SS, and of course, the default gateway of each of those tables is the gateway indicated in the schema.
First step is take care about the routes for hosts to monitor; using GUIFI connection will be checking connectivity to 8.8.8.8 and using SS the monitored host will be 8.8.4.4.
Second step is configure two routing tables, those routes will check Internet hosts availability. Routes are resolved recursively (more info), and will be active only if any host is pingable.
Next step will be create marking rules in the firewall:
# next rule mark all LAN traffic (10.2.0.0/26) before routing# it'll be processed by routing table GUIFI# it makes GUIFI the default Internet connection /ip firewall mangleadd action=mark-routing chain=prerouting comment="All LAN traffic" dst-address=\!10.0.0.0/8 new-routing-mark=GUIFI passthrough=no src-address=10.2.0.0/26
If any specific host, service or whatever want to use specific routing table, then you can create new rules with proper mark to redirect the traffic to that Internet connection. But if that path fails other Internet connection will be used.
In my case I have a more complicated scenario, internal VoIP server uses a IP Telephony service only available through GUIFI connection. The way to force that is forbidding traffic to SS connection. A simple firewall rule will help to do that:
# X.X.X.X = IP address of the IP telephony provider/ip firewall filteradd action=reject chain=forward dst-address=X.X.X.X in-interface=\ bridge-lan out-interface=SS-eth2
PKCS#12 is a container for storing many cryptography objects as a single file. It is commonly used to bundle a private key with its X.509 certificate or to bundle all the members of a chain of trust. This is a fast and simple summary about how to extract your keys from those kind of files:
To avoid that in future before filling the partition, it’s a good idea to install and run periodically: purge-old-kernels. Installation and example of use are:
# installationapt-get install bikeshed# keep three old kernels:purge-old-kernels --keep 3# if you want to put that in the crontab use that commandpurge-old-kernels --keep 3 -qy
If you’re a Grub user don’t forget to run:
update-grub2
Personally I have a nightmare with that problem and Ubuntu, especially with version 12.04 which is installed in a lot of servers that I manage. I repeated the previous process a lot of times and in the end, I decided to document it because I always have to go to Google and find the proper steps to solve that problem.
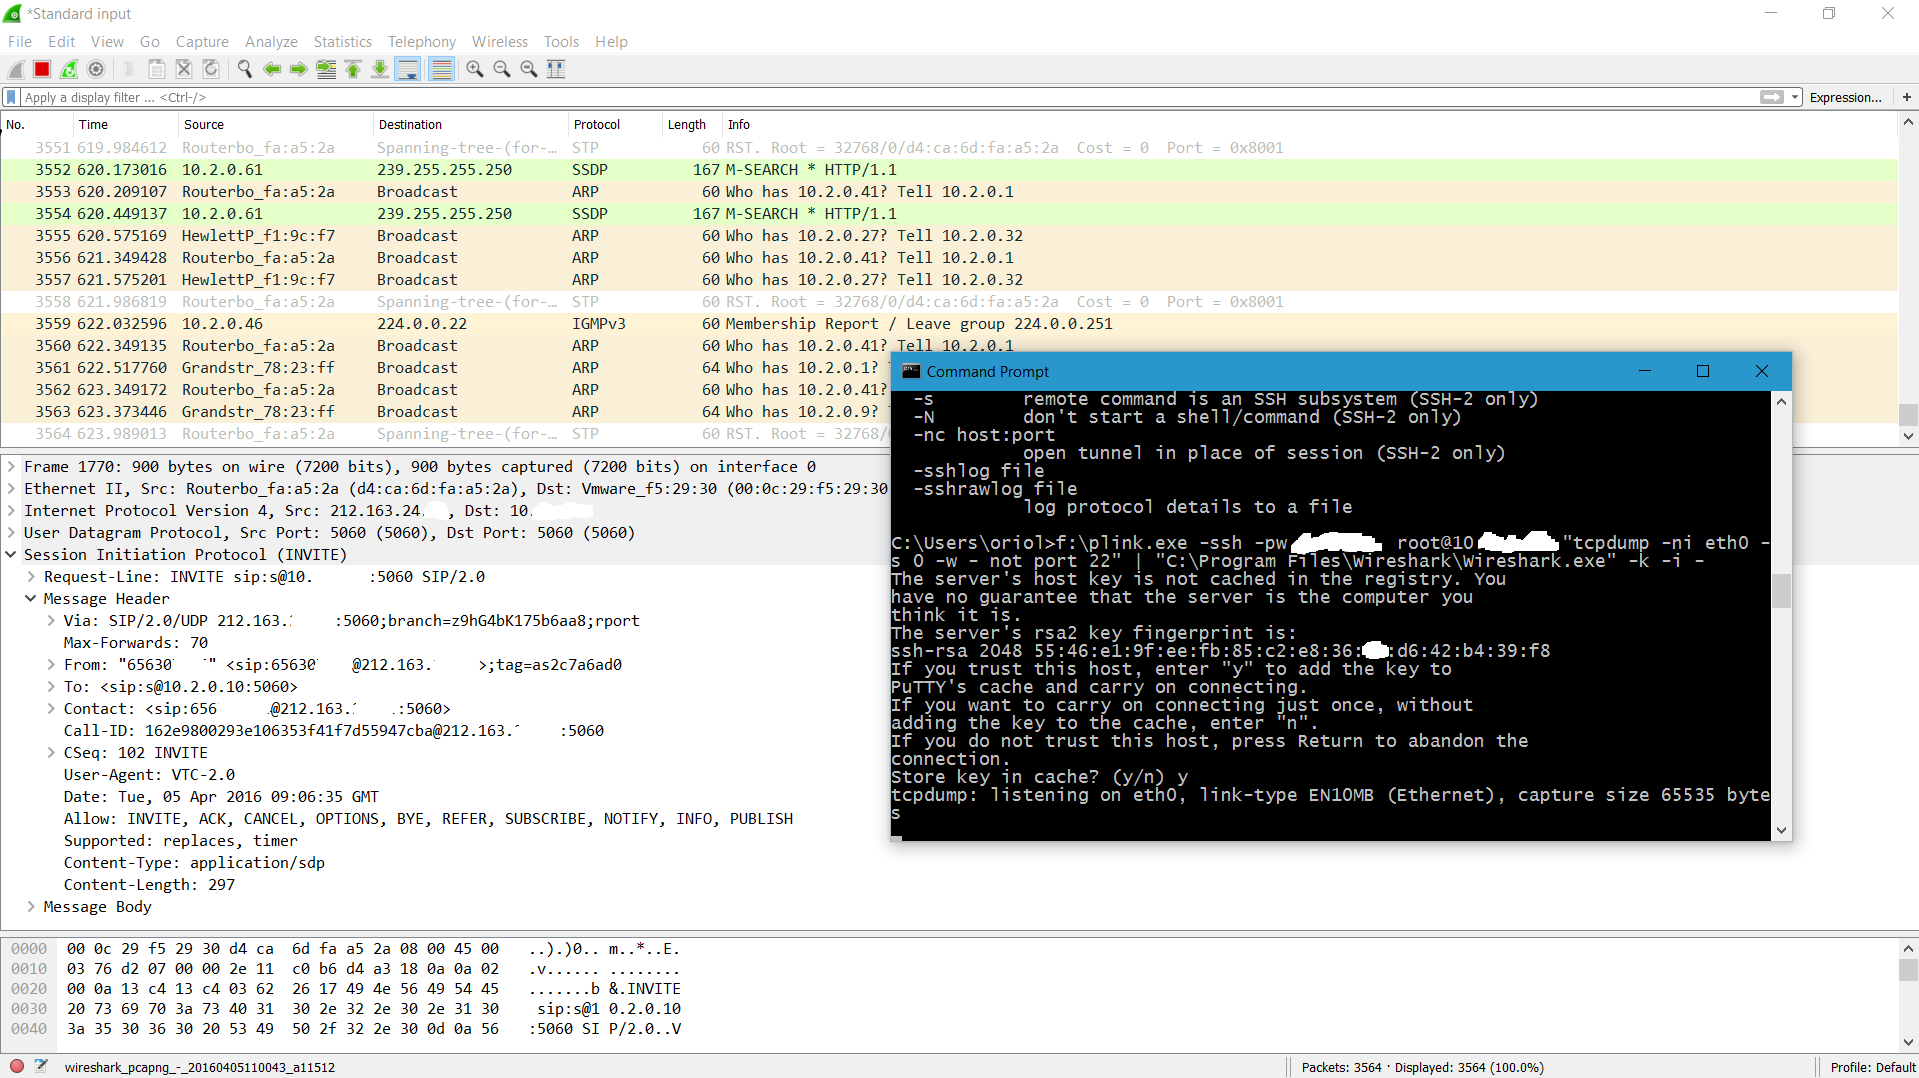
Sniffing and inspect complex protocols on “tcpdump” is usually painful. Of course, “tcpflow” is a very useful tool but is not always enough to sniff in a console. Wireshark is always a better option when it’s time to debug and troubleshooting communication problems.
But it’s not always easy to plug a Network TAP where you want to sniff. If at that point we have a Linux box with “ssh” and “tcpdump”. An interesting option is stream sniffed traffic to another box with Wireshark and dissect packet octets in their layers, fields, etc.
When Wireshark box is based on Windows you need “plink.exe“, and you can do thinks like that:
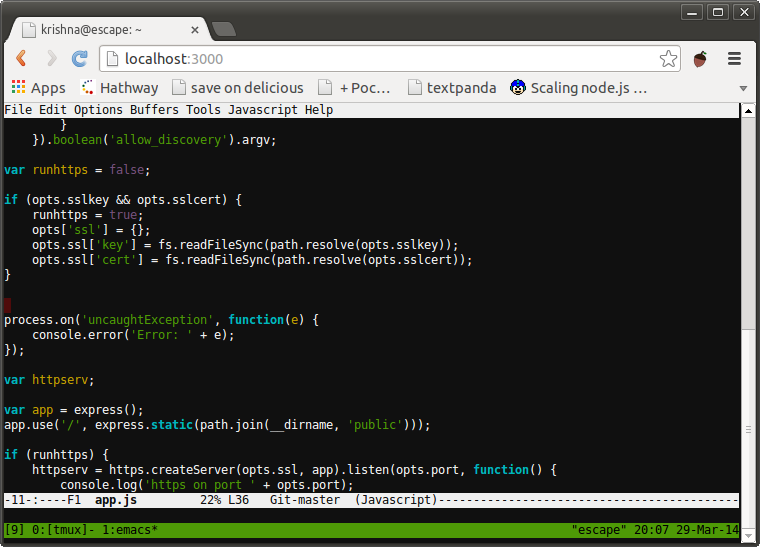
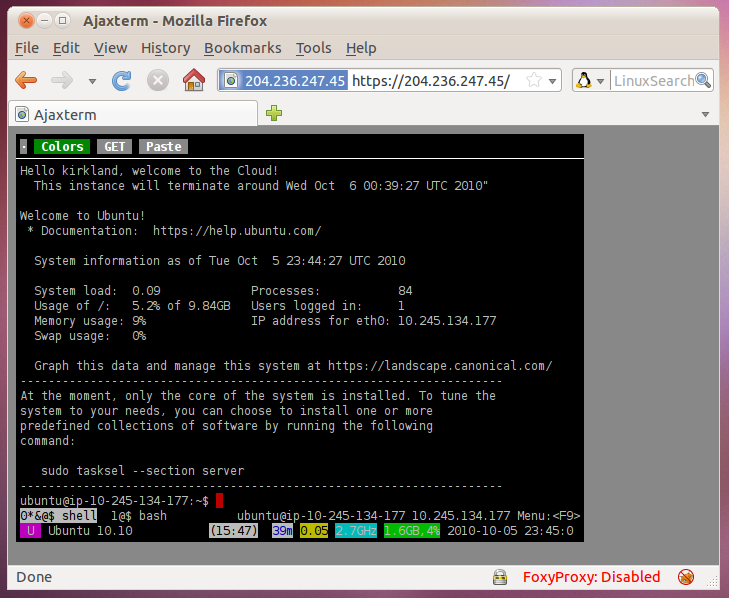
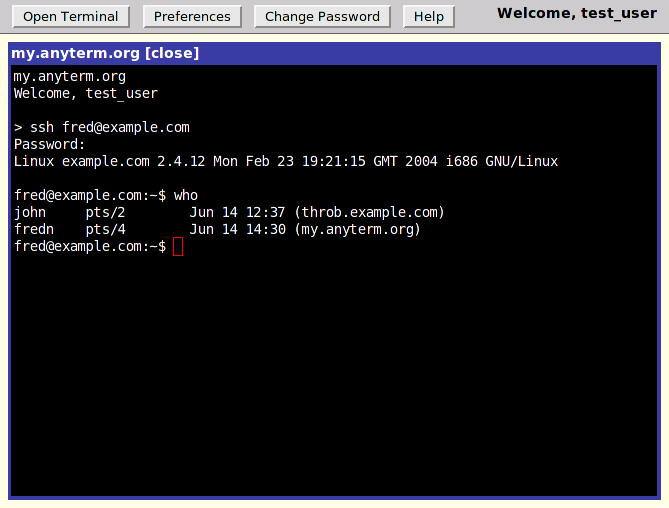
Lately I found some useful web applications that publish a terminal application. This is very useful when you are traveling or you have a remote server which you want to maintain or access from anywhere. Also another interesting use of this kind of applications is as a terminal for embedded devices.
I tried to use them as my default applications but all of them have the same problem: keyboard shortcuts conflict with the browser. I’m very used to use a lot of shortcuts to manage my terminal application and remote shell and this is a problem because most of the shortcuts are redefined by your browser. May be it’s possible to disable browser shortcuts when you are using this kind of web applications but I didn’t find how.
I hope this small list is as much useful for you as it is for me:
As simple as that, if you add a new virtual hard drive using VMWare in your virtual machine with Linux and you want to force the re-scan SCSI bus to see the new hard drive when you run, for example: “fdisk -l”. You can force the SCSI bus re-scan with:
# take into account that your new hard drive could be added in different point than "host0"echo "- - -" > /sys/class/scsi_host/host0/scan
Next commands are very useful when you don’t have access to the vSphere UI and you have to access to VMWare Hypervisor using SSH or console:
# get the list of virtual machinesvim-cmd vmsvc/getallvms# get the state of a VM with #id: VM_IDvim-cmd vmsvc/power.getstate VM_ID# turn on the virtual machine with #id: VM_IDvim-cmd vmsvc/power.on VM_ID
Another option to turn on the virtual machine using an Ansible playbook:
A long time ago I wrote an entry post about how to set up the SMTP in linux boxes using a relay system you can find the post here: Relay mail from your server without MTA. Remember that SSMTP is not a SMTP service for your system but it’s more than enough for all servers that don’t work as a mail servers. Historically Unix/Linux uses sendmail command to send system notifications but usually this mails are lost because system configurations are not completed. My advice in this sense is use SSMTP.
In the past I used to use SSMTP with a GMail account but security constraints in Google mail services make it difficult to configure today. The new alternative is set up a free Mandrill account as a relay host. Mandrill is a Mailchimp service that allows you to send a lot of emails without problems and there is a free account that allows to send up to 12.000 mails per month free, more than enough usually. If you don’t know how to set up a Mailchimp account the best option to learn how to do it is follow the support documentation it’s very good IMHO.
When you have a lot of linux machines to administer you need something fastly replicable. As you know use Ansible is a very good option. Then I developed a new Ansible role to set up Mandrill accounts to SSMTP services massively using Ansible.